How to Remove Plastisol Ink Spots from Shirts with a Spot Cleaning Gun
How to Remove Plastisol Ink Spots from Shirts with a Spot Cleaning Gun
A tiny plastisol ink dot outside the design can turn an otherwise good shirt into a reject. The same problem can appear as a fingerprint near the hem, a smear beside a sleeve print, or a small mark caused by a pinhole in the stencil.
A spot cleaning gun can help remove localized plastisol ink contamination when the cleaning fluid, garment, and equipment are compatible. The process uses a controlled liquid jet to flush unwanted ink through the fabric toward an absorbent backing or suitable extraction surface.
Success depends on more than spray strength. Before treating a shirt, you need to identify the condition of the ink, test the fabric, and decide whether the defect is realistically repairable.
This guide focuses on small, unwanted ink spots. Removing a complete printed design presents a much greater risk of visible staining, fabric damage, and uneven results.
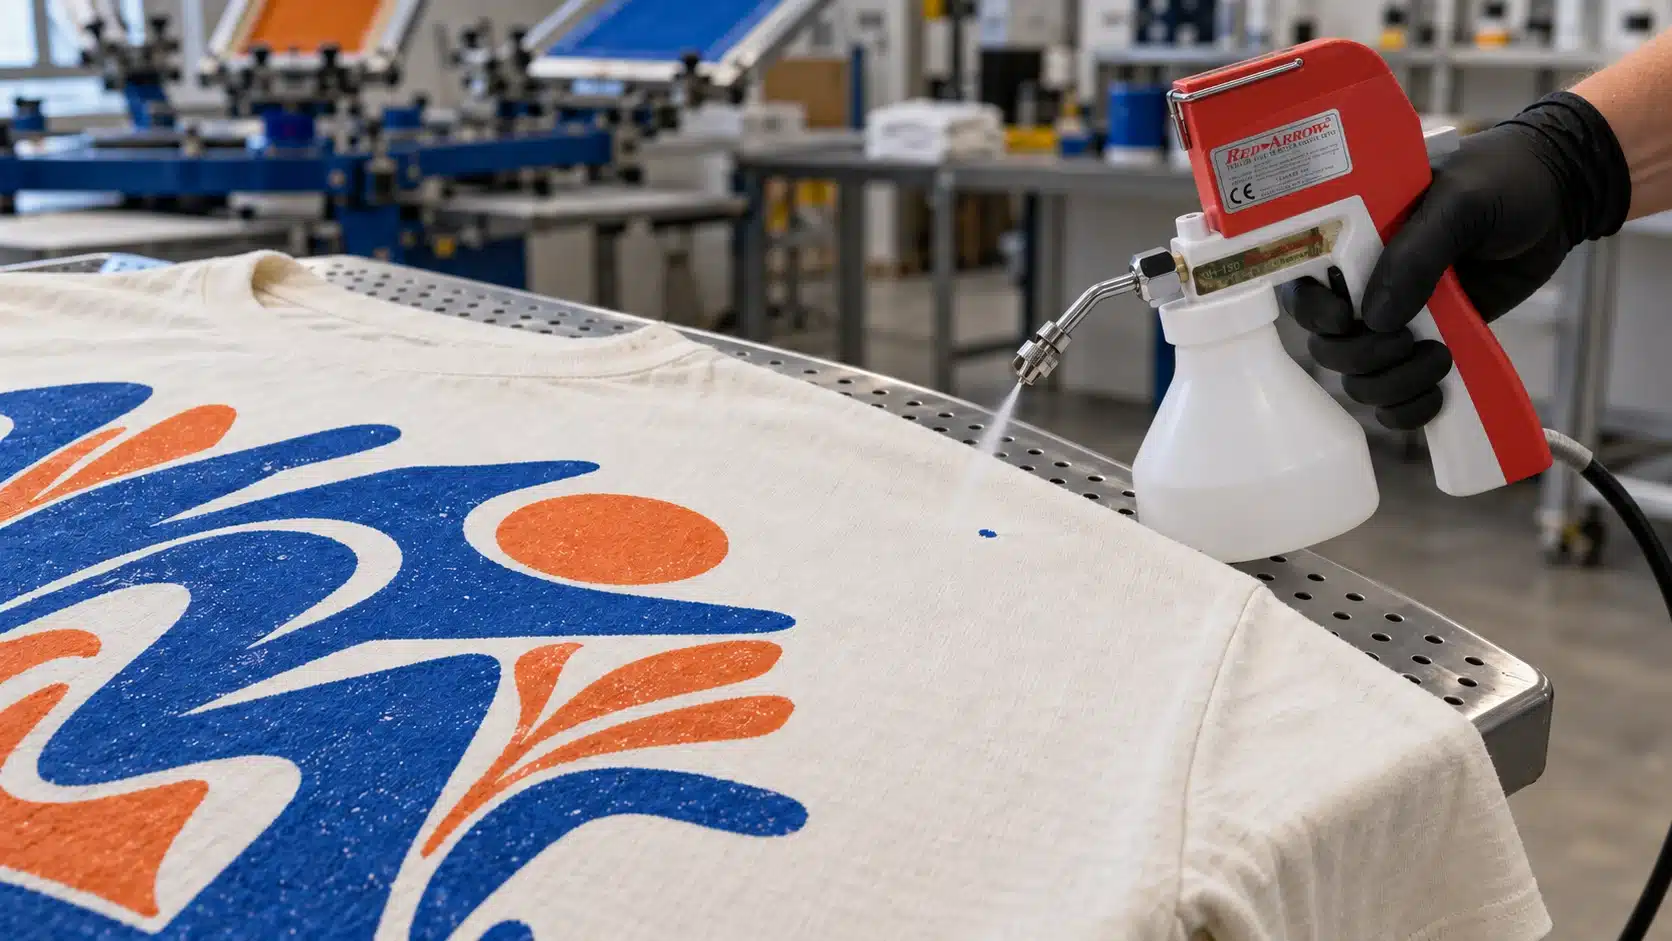
Can a Spot Cleaning Gun Remove Cured Plastisol Ink?
Yes, suitable equipment and purpose-formulated cleaning fluids can remove some cured plastisol ink spots from garments. For example, cleaning chemical manufacturer CCI identifies cured plastisol as an intended application for its SR-2000 spot cleaning fluid. That establishes the application, but it does not guarantee a clean result on every shirt.
Your result will depend on:
- The ink formulation and thickness.
- Whether the ink is uncured, flashed, or fully cured.
- The garment’s fibers, dyes, and surface treatments.
- The size and position of the mark.
- The compatibility of the gun and cleaning fluid.
- How much treatment the fabric can tolerate.
A small isolated speck on a tested garment is a more practical repair candidate than a thick, multicolor print covering a large area.
The aim is to restore the garment to an acceptable condition. If the ink disappears but leaves a pale patch, roughened fibers, or a visible ring, the repair is incomplete.
Identify the Ink Condition Before Cleaning
“Dry ink” is an imprecise description. A print that feels dry after flashing may still be only partially gelled.
International Coatings distinguishes flashing from full curing: flashing makes the ink surface dry to the touch, while full cure requires the entire plastisol film to reach its specified fusion conditions.
| Ink condition | What you may observe | Main cleaning concern |
|---|---|---|
| Uncured | Soft, tacky ink that transfers easily | Smearing the mark into a larger area |
| Flashed or partially gelled | Surface feels dry, but the ink has not necessarily reached full cure | Mistaking surface dryness for complete curing |
| Fully cured | A fused ink film after the required curing process | Removing the film without damaging the fabric or nearby print |
Use production history to identify the ink condition whenever possible. Touch alone is not a reliable cure test.
Handling Fresh, Uncured Ink
Keep the affected shirt away from clean garments and work surfaces. If a raised blob is present, carefully lift away loose excess with a clean, blunt tool without dragging it across the knit.
Avoid aggressive rubbing. It can turn a small deposit into a broad smear and push contamination farther into the fabric.
Do not deliberately flash or cure the unwanted mark as a general preparation step. Follow the cleaning product’s instructions for the ink condition you actually have.
Handling Fully Cured Ink
Allow the garment to cool before inspection and cleaning. Confirm that the selected fluid is intended for cured plastisol on textiles.
Do not assume that a product used to clean wet ink from screens or equipment is also suitable for finished shirts.
Decide Whether the Shirt Is Worth Treating
Before loading the gun, assess the defect.
| Defect | Practical assessment |
|---|---|
| Tiny ink dot outside the design | Often a reasonable candidate for a controlled test |
| Small fingerprint or narrow smear | May be repairable, but contamination can spread during treatment |
| Ink spot touching fine printed detail | Higher risk of disturbing the intended design |
| Thick, layered deposit | May require treatment beyond what the fabric can tolerate |
| Large misplaced logo or complete print | Poor candidate for routine spot repair |
| Scorching, dye migration, or existing fiber damage | Requires a different diagnosis; ink removal may not address the defect |
Also consider the garment’s value and replacement cost. Repeated cleaning attempts can consume more time and materials than replacing the blank.
Choose a Compatible Plastisol Spot Cleaning Fluid
Select the fluid before deciding how aggressively to spray.
The product should be intended for garment spot cleaning and suitable for the ink you need to remove. It must also meet the cleaning gun manufacturer’s requirements.
Check three separate forms of compatibility:
- Ink compatibility: Is the fluid intended for uncured or cured plastisol?
- Garment compatibility: Can the fabric, dyes, finish, and nearby decoration tolerate it?
- Equipment compatibility: Does the gun allow that fluid type?
These checks are separate. A chemical that removes ink effectively may still be unsuitable for your gun or garment.
Read the current technical data sheet and safety data sheet. Do not select a cleaner solely because its description says “strong,” “fast drying,” or “non-flammable.”
Avoid substituting acetone, paint thinner, screen wash, or another workshop solvent unless the relevant manufacturers explicitly approve the application. Never mix cleaning chemicals to increase their strength.
Prepare the Workstation
Have the following ready:
- A textile spot cleaning gun with its operating instructions.
- An approved plastisol spot cleaning fluid.
- A suitable garment support and clean absorbent backing, or a compatible extraction station.
- A matching scrap garment or fabric sample.
- Eye protection and chemical-resistant gloves selected according to the fluid’s safety data sheet.
- Appropriate ventilation and a procedure for handling contaminated materials.
A cloth behind the stain collects expelled contamination; it does not control airborne exposure. Where extraction is used, the system must be suitable for the chemical involved.
Never place a hand behind the cleaning area or point the gun at skin. Treat a suspected high-pressure injection injury as an emergency.
For broader equipment setup and operation, see our guide to using a screen printing spot cleaning gun.
How to Remove Plastisol Ink Spots from Shirts: Step by Step
Step 1: Test a Matching Sample
Use a spare garment from the same batch whenever possible.
First test the fluid and spray action on an unprinted area. Then, if a suitable sample is available, test the actual ink under comparable curing conditions.
Let the sample dry completely before judging the result. Look for:
- Color loss or dye transfer.
- Rings or residual staining.
- Changes in sheen.
- Raised fibers or distortion.
- Damage to nearby decoration.
A test on plain cotton does not establish compatibility with a dyed polyester production shirt.
Step 2: Separate the Garment Layers
Position the affected panel so expelled ink and fluid cannot reach another part of the shirt.
Keep the front and back layers separated. Avoid placing a seam, pocket, zipper, or folded fabric directly behind the mark.
Support the fabric smoothly without stretching it tightly. Check that hands and other body parts remain clear of the spray path.
Step 3: Provide a Clean Exit Path for the Ink
Place clean absorbent material behind the affected area, or position it on the suitable extraction surface.
The backing must remain capable of collecting the removed ink. Replace or reposition it when contaminated so the stain cannot transfer back onto the garment.
The objective is to carry the unwanted material away, rather than move it sideways into clean fabric.
Step 4: Check the Spray Away from the Shirt
Prime and test the gun according to its manual, directing the spray into an appropriate collection area.
Check for an irregular, split, or uncontrolled stream before touching the garment. Resolve equipment problems first.
Start with the least aggressive effective setting permitted by the manufacturer. Use the specified working distance for your model rather than a universal pressure or distance recommendation.
For example, TENLUXE provides a 10–20 cm working distance for its Type A gun. That is model-specific guidance, not a rule for every textile cleaning gun.
Step 5: Treat a Small Area and Inspect
Apply a brief, controlled pass consistent with the equipment and fluid instructions.
Pause to check whether the ink is being removed, spreading, or affecting the garment. Keep the treatment localized and protect the intended print from the spray path and runoff.
Do not automatically move closer when a mark resists removal. Reconsider the fluid, ink thickness, backing condition, and fabric response first.
Step 6: Repeat Only While the Result Improves
Continue only if the stain is becoming smaller and the fabric remains unchanged.
Stop if:
- A pale patch appears.
- Fibers begin to lift or distort.
- The nearby print softens or loses detail.
- The wet area expands without meaningful ink removal.
- Repeated passes produce no further improvement.
More fluid and more force can turn a repairable mark into permanent damage.
Step 7: Dry and Reinspect
Allow the shirt to dry according to the cleaning product’s instructions and the workstation procedure.
Do not use a flash dryer, heat press, or heat gun to accelerate drying unless that process is explicitly approved for the chemical and application.
Inspect the dry garment from both sides under consistent lighting. Compare it with an untreated area and, where useful, an approved production sample.
Check the original stain, the edge of the treated area, the reverse side, and the nearby print before releasing the garment.
Why Does a Ring or Shadow Remain?
A visible mark after cleaning does not always mean plastisol is still present.
| Appearance after drying | Possible explanation | What to check |
|---|---|---|
| Colored shadow | Remaining ink or pigment | Whether further approved treatment improves the sample |
| Defined ring around the treated area | Redistributed contamination or cleaning residue | Fluid quantity, backing cleanliness, and extraction |
| Lighter patch | Possible dye loss | Compare garment color with an untreated area |
| Rough or fuzzy surface | Possible mechanical damage | Inspect fibers under angled light |
| Changed gloss or distorted decoration | Possible finish or print damage | Compare with an approved garment |
Some manufacturers describe feathering the wet edge with a wider spray as part of their application procedure. Use such a method only when it is specified for the chosen equipment and chemical and has passed your garment test. It will not restore lost dye or damaged fibers.
Cotton, Polyester, and Blends Need Separate Tests
Fabric composition is a starting point, not a complete compatibility assessment.
On cotton shirts, watch for fluid spreading through the treated area and contamination collecting at its edges.
On polyester and performance garments, inspect for color change, altered sheen, and damage to finishes or stretch behavior.
Blends need their own testing. A successful result on a 100% cotton shirt does not establish a safe process for a cotton-polyester version in the same color.
For dark garments, inspect the fully dried repair especially carefully. A small lightened area may be more noticeable than the original ink speck.
Choosing a Spot Cleaning Gun for Plastisol Repairs
For localized ink removal, prioritize control and compatibility when comparing equipment.
Useful questions include:
- Can the gun deliver a consistent, controllable spray?
- Is the intended cleaning fluid approved for the model?
- Does the power supply match the destination’s voltage and frequency?
- Are replacement nozzles and service parts available?
- What operating and maintenance requirements apply?
HANZE’s textile spot cleaning gun range provides a starting point for comparing available equipment. When requesting a recommendation, include the garment composition, ink condition, typical defect size, local electrical supply, and proposed cleaning fluid.
For a broader purchasing comparison, read our screen printing spot cleaning gun buying guide.
Reduce the Defects That Need Spot Cleaning
Record where recurring marks originate. A repeated ink dot in the same location may point to a stencil defect; fingerprints and smears may indicate handling or workstation contamination.
Useful checks include:
- Inspecting exposed screens for pinholes before production.
- Keeping hands, tools, and garment-contact surfaces clean.
- Checking screen undersides when unexplained marks recur.
- Separating contaminated garments from finished stock.
- Inspecting early production pieces before continuing the run.
Use repair records to improve the printing process. A cleaning gun is most useful when it handles occasional defects while the underlying causes are corrected.
Frequently Asked Questions
Can you remove plastisol ink from a shirt after curing?
Some localized cured plastisol marks can be removed with an appropriate textile spot cleaning fluid and compatible gun. Complete removal without visible damage is not guaranteed. Test the actual garment and ink combination first.
Will washing remove plastisol ink spots?
Ordinary washing is not a dependable correction method for plastisol contamination. Fully cured plastisol is intended to remain on the garment through laundering. Keep the affected shirt separate and assess it before washing or applying additional heat.
Can a spot cleaning gun remove an entire screen-printed design?
It may disturb or remove portions of a print, but whole-design removal is a much larger task than spot correction. Extensive treatment increases the chance of residual shadows, color change, and fabric damage.
Can I use water in the gun to remove plastisol?
Do not assume that water is suitable for either the ink-removal process or the gun. Use only the medium approved for the specific equipment and cleaning application.
Should I clean from the front or the back?
Choose the direction that allows contamination to leave the affected panel without crossing good decoration or reaching another garment layer. Follow the relevant instructions and validate the approach on a sample; neither direction is universally suitable.
When should I stop trying to save the shirt?
Stop when further treatment no longer improves the stain, when the garment or intended print begins to change, or when the repair exceeds your acceptable time and cost. Release the shirt only after the treated area is fully dry and passes the same quality standard as the rest of the order.