How to Expose a Screen for Screen Printing
How to Expose a Screen for Screen Printing
A properly exposed screen is the foundation of clean, repeatable screen printing.
If exposure is too short, the stencil may remain soft, wash away during development, or break down prematurely on press. If exposure is excessive, fine lines, small text, and halftones may become difficult or impossible to wash out. Poor film contact can create another problem entirely: soft or blurred stencil edges even when the exposure time itself is close to correct.
That is why learning how to expose a screen for screen printing is not simply a matter of putting a coated screen under UV light for a certain number of seconds.
A reliable exposure process depends on several variables working together:
- a properly prepared and coated screen;
- fully dried photo emulsion;
- an opaque film positive;
- good film-to-screen contact;
- a suitable UV exposure source;
- the correct exposure time for the specific screen;
- and controlled washout after exposure.
This guide explains the complete exposure process, how to determine the correct exposure time, how to recognize exposure problems, and how to make the process more consistent from screen to screen.
What Happens When You Expose a Screen?
Screen printing photo emulsion contains light-sensitive chemistry.
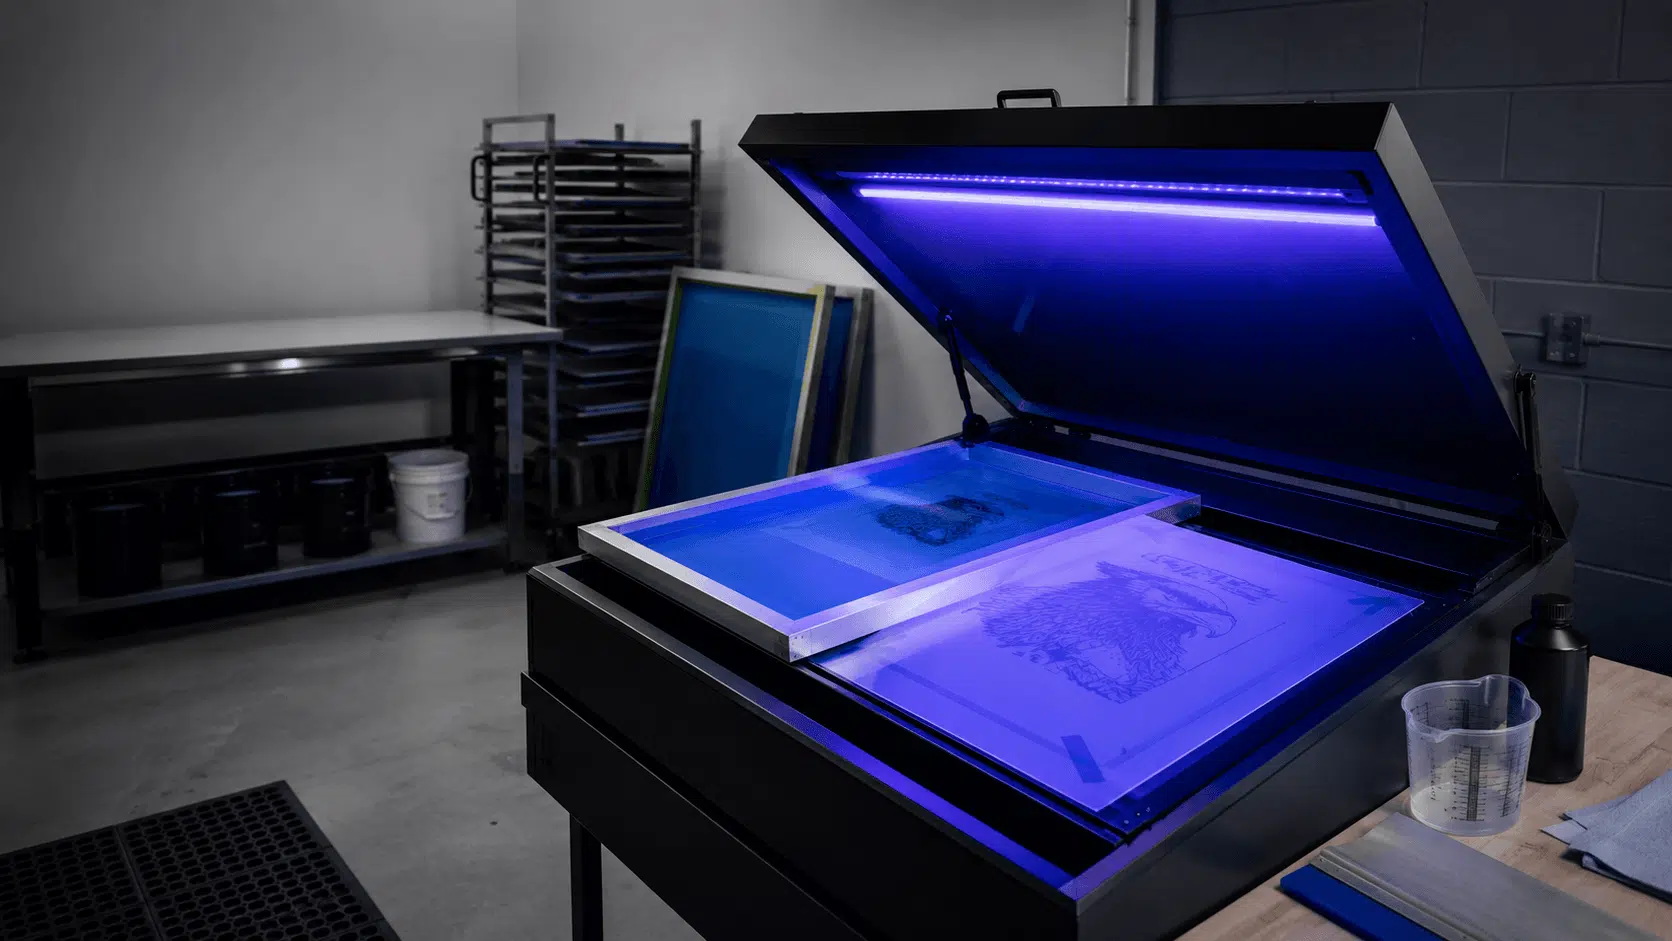
During exposure, ultraviolet energy reaches the areas of emulsion that are not protected by the opaque artwork. Those exposed areas harden and become resistant to the water used during stencil development.
The dark areas of the film positive block UV light. Because those image areas receive much less UV energy, they remain capable of washing out during development, creating the open stencil through which ink will later pass.
In simple terms:
UV-exposed emulsion → hardens and remains on the mesh
Artwork blocks UV → image area washes open
The goal is not simply to make the stencil hard. The exposure must be sufficient to cure the stencil while still preserving the detail required by the artwork.
That balance is what makes exposure testing important.
What Do You Need to Expose a Screen?
Before beginning, prepare the basic screen-making materials and equipment.
You will normally need:
- a stretched screen printing frame;
- appropriate screen printing mesh;
- photo emulsion;
- an emulsion scoop coater;
- a clean, light-safe drying area or screen drying cabinet;
- a film positive;
- a screen printing exposure unit;
- an exposure calculator or step wedge;
- a washout area or washout booth;
- clean water;
- and a clean working environment.
For repeat production, controlling the process becomes increasingly important. Dust, moisture, inconsistent coating, changing light output, and poor film contact can all affect the resulting stencil. Commercial screen rooms therefore tend to treat exposure as part of a controlled prepress workflow rather than an isolated step.
Step 1: Make Sure the Screen Is Ready for Exposure
Exposure quality starts before the exposure unit is switched on.
The mesh should be clean and properly degreased before coating. Contamination from oil, dust, silicone, or other residues can interfere with uniform emulsion coating and may contribute to defects such as fish eyes and pinholes.
Coat the screen according to the photo emulsion manufacturer’s instructions and your required stencil thickness.
The objective is not necessarily to apply as much emulsion as possible. Instead, you want a smooth and repeatable coating suitable for the artwork and printing application.
A thicker stencil generally requires more UV energy to cure completely because the light must penetrate through more emulsion. This is one reason two screens using the same exposure machine do not necessarily require identical exposure times.
If you need a more detailed coating procedure, it is better to treat that as a separate part of the screen-making process. For exposure itself, the key requirement is simple:
Start with a clean, consistently coated screen.
Step 2: Dry the Coated Screen Completely
Do not expose wet or partially dried emulsion.
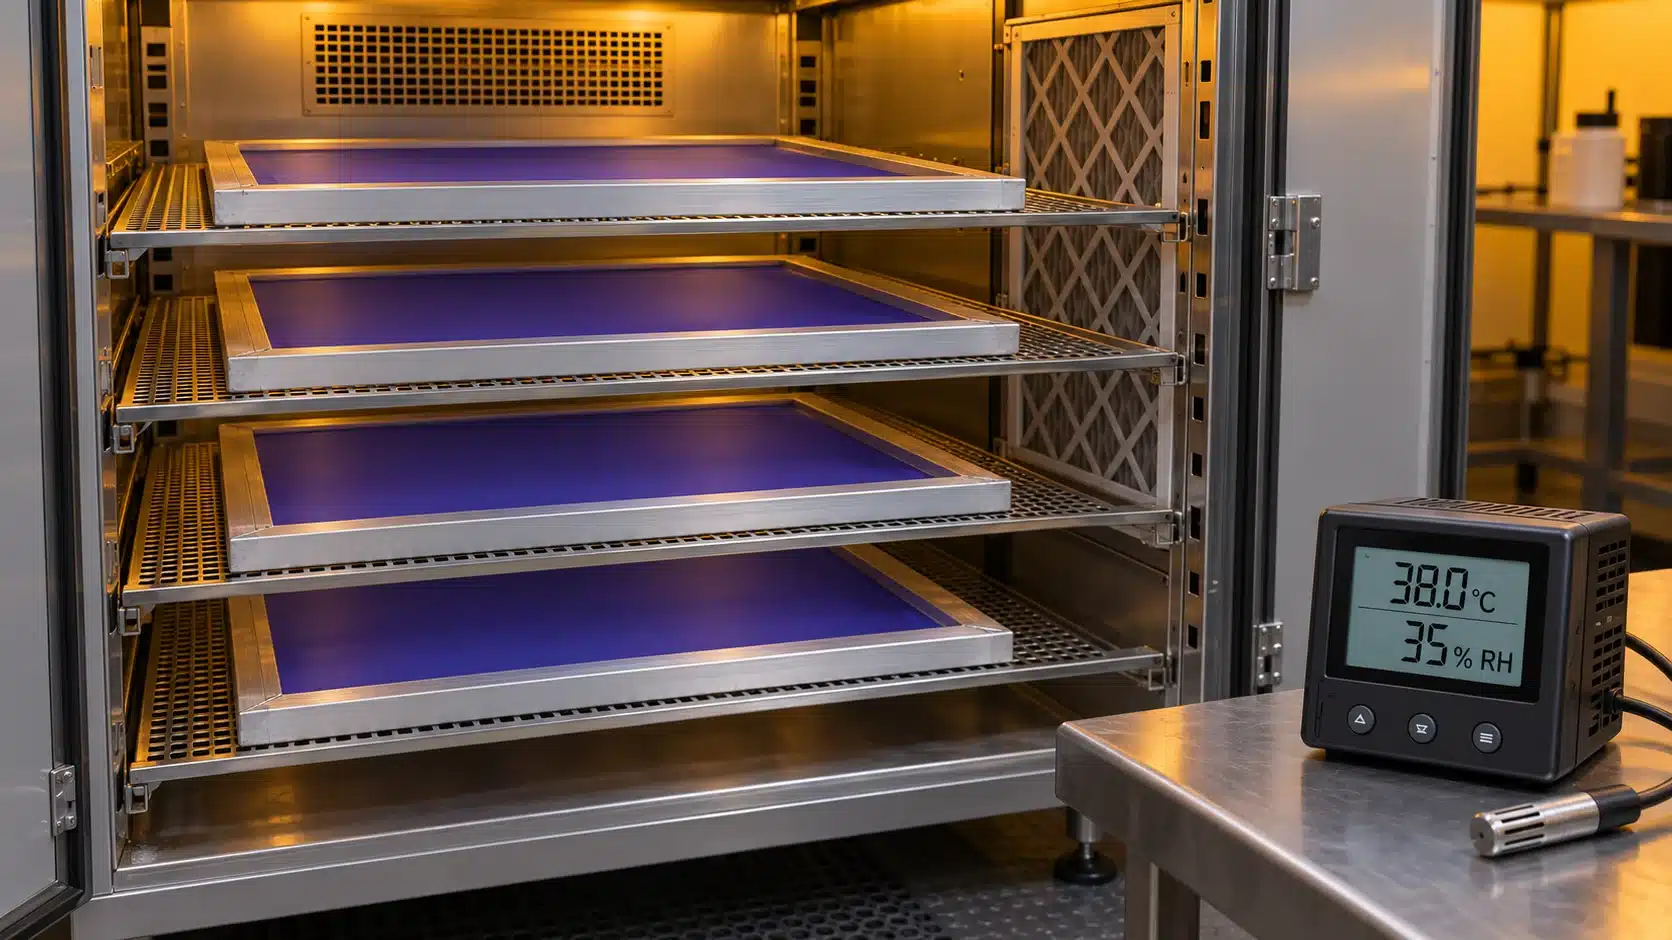
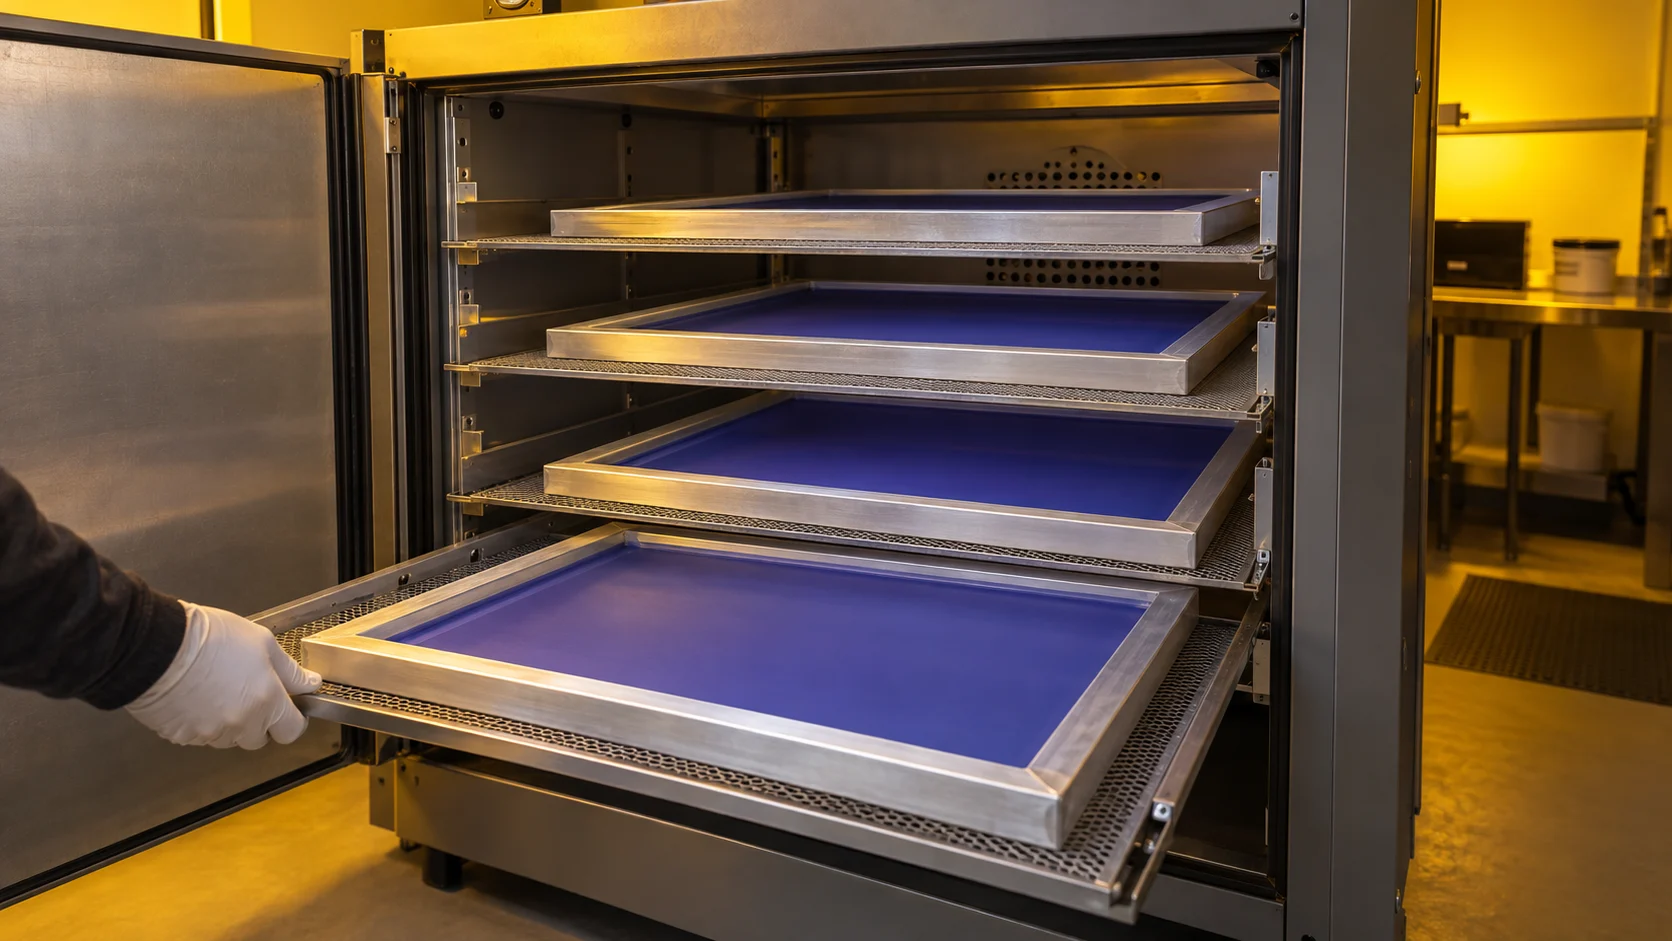
A coated screen should be thoroughly dried in a clean area protected from unwanted UV exposure.
Hanze recommends drying coated screens horizontally with the print side facing downward in a clean, dark drying cabinet, while keeping drying temperature controlled.
The exact drying conditions should follow the technical data for the emulsion being used.
What matters most is that the screen is actually dry before exposure.
A screen that still contains moisture can behave differently from a properly dried screen and make exposure results difficult to reproduce.
Signs that your screen-making process needs better drying control
Watch for:
- tacky emulsion surfaces;
- screens sticking to the exposure glass;
- inconsistent exposure results from one day to another;
- soft stencil areas after washout;
- or unexpected loss of fine detail.
Humidity can also affect drying time, so a screen that appears ready after a certain period in one season may need longer under different environmental conditions.
For production environments, a dedicated screen printing drying cabinet can help create more repeatable drying conditions than simply leaving coated screens in an uncontrolled room.
Step 3: Prepare a High-Quality Film Positive
The film positive determines where UV light reaches the emulsion.
Your artwork areas should therefore be sufficiently opaque to block the exposure light effectively.
A weak or semi-transparent black image allows unwanted UV energy to pass through the film. When that happens, areas that are supposed to wash open can partially harden instead.
The result may include:
- blocked fine lines;
- partially closed text;
- lost halftone dots;
- difficult washout;
- or inconsistent stencil openings.
Hanze recommends producing artwork as dark as possible when preparing transparency films for screen exposure.
Good film output also requires sharp edges. Exposure cannot restore detail that was already lost when the film positive was printed.
Before placing the film on the screen, inspect it for:
- adequate image density;
- scratches;
- dust;
- fingerprints;
- damaged edges;
- and correct image orientation.
Also clean the exposure glass and screen surface.
Step 4: Make Sure the Film Is in Close Contact with the Screen
Good contact between the film positive and the coated screen is one of the most important factors in producing sharp stencil edges.
If there is a gap between the film and emulsion, UV light can spread underneath the edges of the artwork.
Instead of a sharp boundary between exposed and unexposed emulsion, you may get:
- fuzzy lines;
- loss of small details;
- poorly defined text;
- reduced halftone quality;
- or sawtooth-like edges.
Hanze defines contact as the degree to which the positive is pressed tightly against the emulsion and notes that stronger contact improves detail. A vacuum frame is designed specifically to pull the film and screen together during exposure.
For film-positive exposure, the emulsion side of the positive should make direct contact with the appropriate coated surface of the screen, following the configuration recommended for your exposure unit and emulsion system.
Why vacuum exposure helps
A vacuum system removes air between the screen, film and exposure surface and holds them tightly together.
This becomes increasingly important when reproducing:
- small text;
- thin lines;
- halftones;
- high-resolution graphics;
- technical markings;
- or other detail-sensitive artwork.
For simple graphics, basic contact systems may sometimes be sufficient. As resolution requirements increase, however, contact quality becomes much more critical.
Step 5: Determine a Starting Exposure Time
One of the most common questions in screen making is:
How long should I expose a screen for screen printing?
There is no single correct answer.
Exposure time varies according to the complete screen-making system.
Important factors include:
| Variable | Why It Matters |
|---|---|
| Emulsion type | Different sensitizer systems respond differently to UV energy |
| Emulsion thickness | A thicker stencil generally needs more energy to cure through |
| Mesh count | Mesh structure affects coating thickness and light behavior |
| Mesh color | Dyed and white meshes can behave differently during exposure |
| Light source | LED, metal halide and other UV systems deliver energy differently |
| Light output | A stronger source can reach the required exposure faster |
| Lamp condition | Output from some lamp technologies changes with use |
| Wavelength | The light source needs to match the sensitivity range of the emulsion |
| Film density | Weak positives allow unwanted light through image areas |
| Film contact | Poor contact reduces edge definition |
| Moisture | Incomplete drying changes stencil behavior |
| Exposure distance | Relevant particularly in lamp systems where light-to-screen distance can vary |
Hanze recommends starting with the exposure information in the emulsion manufacturer’s technical data and then testing the actual setup rather than assuming the published estimate is the final production setting.
This is an important distinction.
An exposure chart gives you a starting point.
An exposure test gives you a working setting for your screen room.
Step 6: Use an Exposure Calculator Instead of Guessing
For professional or repeat production, an exposure calculator or step wedge is one of the most useful tools in the screen room.
Instead of exposing complete screens repeatedly at random times, an exposure test lets you compare several exposure levels on the same test screen.
Hanze recommends tools such as a 21-step transmission gray scale for evaluating exposure hardness, while Hanze provides exposure calculators that allow screen makers to compare different exposure levels and resolution targets.
A typical workflow looks like this:
- Check the emulsion manufacturer’s recommended exposure information.
- Choose a reasonable starting exposure.
- Place the exposure calculator or step wedge on the coated screen.
- Expose the test screen.
- Wash out and dry the screen.
- Inspect the test areas.
- Identify the setting that gives sufficient stencil cure while maintaining required detail.
- Record the final exposure time.
The exact method depends on the exposure calculator being used, so follow its instructions rather than applying a universal formula.
Why the test screen must be evaluated after development
Exposure is not judged by time alone.
The stencil has to be washed out and inspected.
Hanze specifically recommends developing the test stencil and allowing it to dry before final evaluation because a wet stencil can appear swollen and give misleading visual results.
Your objective is to find the exposure that provides:
- stable stencil areas;
- clean image washout;
- sharp edges;
- good fine-detail reproduction;
- and sufficient stencil durability.
Once a reliable exposure has been established, record it together with the related screen variables.
For example:
Emulsion: Product A
Mesh: 156 mesh yellow polyester
Coating: 1 + 1
Exposure Unit: LED Unit A
Exposure Time: XX seconds
Film System: Inkjet positive
Result: Approved
That record becomes far more useful than trying to remember exposure times from previous jobs.
Step 7: Position the Screen and Start the Exposure
Once the correct exposure setting has been established, prepare the production screen.
Before closing the exposure unit:
- Check that the screen is completely dry.
- Clean dust from the film, stencil and exposure glass.
- Position the film correctly.
- Confirm close film-to-emulsion contact.
- Activate the vacuum system if the unit has one.
- Confirm the programmed exposure time.
- Start the exposure cycle.
The exposure unit then delivers UV energy to the coated screen.
Do not open the exposure system or move the artwork during the cycle.
Consistency is critical. If film position, contact pressure, screen orientation, or exposure settings change between screens, results may also change.
Modern screen printing exposure equipment may use UV LED systems, while older or alternative systems may use metal-halide, fluorescent, cold-light, or other UV-producing sources. The important requirement is not simply the name of the lamp technology but whether the system provides appropriate, repeatable UV energy for the emulsion being used.
Step 8: Wash Out the Screen After Exposure
After exposure, remove the screen from the exposure unit and take it to the washout area.
Water removes the emulsion in areas where the positive prevented sufficient UV exposure, revealing the stencil image.
Hanze recommends wetting both sides before washing the image open, while professional emulsion instructions generally emphasize controlled development rather than immediately attacking the stencil with excessive pressure.
A practical process is:
- Wet both sides of the screen evenly.
- Allow water to begin softening the unexposed image areas.
- Develop the stencil with an appropriate spray.
- Concentrate washout on the image until all intended openings are clear.
- Rinse both sides.
- Inspect the image against light.
Do not assume that more water pressure solves every washout problem.
If properly intended image areas refuse to open, the problem may be excessive exposure, insufficient film density, light leakage, or poor artwork contact.
If large areas of stencil begin washing away, exposure may have been insufficient or the screen may not have been fully dried before exposure.
A dedicated screen printing washout booth helps contain water and stencil residue and provides a more controlled location for development and screen reclaiming.
Step 9: Dry and Inspect the Finished Stencil
After washout, remove excess water and allow the screen to dry completely.
Then inspect the stencil carefully.
Check:
- Are all image areas fully open?
- Are edges sharp?
- Are fine lines present?
- Are halftones retained?
- Are there pinholes?
- Is there residual emulsion or scum in open areas?
- Is the stencil firmly bonded to the mesh?
- Are there weak or soft areas on the squeegee side?
The purpose of inspection is not simply to decide whether the screen “looks okay.”
A screen may appear acceptable from a distance while still containing partially blocked openings or weak stencil areas that become problems during printing.
For detailed jobs, inspect the stencil under good light or magnification before taking it to press.
How Do You Know If a Screen Is Underexposed?
An underexposed screen has not received enough effective UV energy to cure the stencil adequately.
Typical signs include:
- soft or slimy emulsion during washout;
- stencil areas washing away unexpectedly;
- weak stencil edges;
- poor durability during the print run;
- rapid stencil breakdown;
- or insufficient cure on the squeegee side.
Hanze explains that UV energy must penetrate through the stencil sufficiently to harden the emulsion through its depth, including the side that experiences mechanical contact from the squeegee during printing.
If a screen is repeatedly underexposed, do not automatically increase exposure time without checking the rest of the system.
Also inspect:
- whether the screen was completely dry;
- whether the emulsion layer changed;
- whether a different mesh was used;
- whether the exposure source is operating normally;
- and whether your exposure test is still valid.
How Do You Know If a Screen Is Overexposed?
An overexposed screen receives enough stray or direct UV energy in image areas to begin hardening emulsion that should wash away.
Common signs include:
- image areas that are difficult to wash out;
- closed fine lines;
- small text filling in;
- missing halftone dots;
- reduced image detail;
- or a thin residual layer of emulsion in areas that should be open.
Hanze describes overexposure as a condition in which the stencil becomes too difficult to wash out, often resulting in lost detail or halftones.
However, difficult washout does not always mean the timer was simply set too high.
Also check the film positive.
If the black artwork is not sufficiently opaque, UV light can penetrate the positive and partially expose image areas even when the nominal exposure time appears reasonable.
Underexposed vs. Overexposed Screen
Use the following table as a quick diagnostic reference:
| Symptom | Possible Underexposure | Possible Overexposure |
|---|---|---|
| Stencil washes away | ✓ | |
| Emulsion feels soft or slimy | ✓ | |
| Stencil breaks down quickly | ✓ | |
| Image is difficult to wash open | ✓ | |
| Fine lines disappear | ✓ | |
| Halftones close up | ✓ | |
| Weak stencil edges | ✓ | |
| Small openings remain blocked | ✓ |
Keep in mind that some symptoms can also be caused by other variables.
For example, blurred edges may result from poor film contact rather than incorrect exposure time. Hanze specifically distinguishes underexposure from poor film contact because both can produce apparent detail problems for different reasons.
That is why systematic troubleshooting is better than adjusting the exposure timer after every problem.
What Affects Screen Printing Exposure Time?
1. Photo Emulsion Type
Different emulsions have different photosensitive systems and exposure characteristics.
Pure photopolymer, diazo and dual-cure emulsions should not be assumed to use the same exposure settings. Hanze, for example, offers separate emulsion technologies designed for different exposure systems and printing applications.
Always begin with the technical information for the actual emulsion being used.
2. Emulsion Thickness
The thicker the stencil, the more UV energy may be required to cure it through its full depth.
If your coating technique changes from one batch of screens to another, exposure requirements may change as well.
This is one reason consistent use of an emulsion scoop coater matters: repeatable coating helps make exposure more repeatable too.
3. Mesh Count and Mesh Characteristics
Mesh selection influences how much emulsion is deposited and how light behaves around the threads.
The relationship becomes particularly important when working with fine detail, high mesh counts, or dyed mesh.
If you regularly change mesh specifications, do not assume one exposure setting will work for every screen.
A dedicated exposure test for each common screen specification is much more reliable.
4. Light Source
LED, metal-halide and other exposure technologies differ in spectral output, intensity and geometry.
Therefore, exposure time from one machine should not automatically be transferred to another.
Even two machines both described as “LED exposure units” may perform differently depending on their LED arrangement, wavelength, working distance, power and optical design.
Treat exposure time as a property of the complete exposure system, not merely the lamp name.
5. Film Density
The black areas of a film positive must block enough UV light to protect the image areas.
Insufficient density increases the risk that unwanted light reaches the emulsion underneath the artwork.
If you are struggling with fine details even after running exposure tests, inspect the film before assuming the exposure machine is the problem.
6. Film-to-Screen Contact
A perfectly calculated exposure time cannot completely compensate for poor film contact.
When the film is separated from the stencil, light can spread beneath artwork edges and reduce definition.
A vacuum exposure system is particularly valuable when detail reproduction and consistency are priorities.
7. Screen Dryness and Humidity
Coated screens should be thoroughly dried before exposure.
Humidity and drying conditions influence how quickly moisture leaves the emulsion, which is why professional screen rooms control drying rather than relying only on elapsed time.
How to Make Screen Exposure More Consistent
The most efficient screen rooms do not try to find a new exposure time for every individual job.
Instead, they standardize the variables that can be standardized.
A simple process-control system can make a major difference.
Standardize common screen specifications
Create repeatable specifications for your most frequently used combinations of:
- mesh count;
- mesh type;
- emulsion;
- coating sequence;
- film output;
- and exposure unit.
Then determine a tested exposure setting for each combination.
Keep an exposure log
Record:
Date → Mesh → Emulsion → Coating → Exposure Unit → Time → Test Result
If a problem appears later, you have something to compare against.
Run another exposure test when something changes
Recheck exposure when you make meaningful changes to:
- emulsion;
- coating thickness;
- mesh;
- film system;
- exposure unit;
- lamp condition;
- or screen-room conditions.
Hanze likewise recommends exposure testing when major variables such as mesh, coating, film density, light source or humidity change.
Keep the exposure area clean
Dust can become a surprisingly expensive screen-making problem.
Clean:
- exposure glass;
- films;
- coated screens;
- drying areas;
- and working surfaces regularly.
A tiny particle positioned between the positive and screen may become a visible stencil defect.
Do You Need a Vacuum Exposure Unit?
Not every screen printing application has the same resolution requirement.
For simple solid graphics, a basic exposure arrangement may sometimes produce acceptable results.
For production environments or detail-sensitive work, however, a vacuum screen printing exposure unit provides an important advantage: consistent, close contact between the film positive and coated screen.
That becomes especially useful for:
- fine lines;
- small lettering;
- halftones;
- multi-color registration work;
- repeated production screens;
- and high-resolution graphics.
If your exposure time appears correct but stencil edges remain soft, film contact should be one of the first variables you inspect.
LED Exposure Unit or Traditional UV Exposure System?
LED exposure technology has become widely used in screen making, but choosing an exposure system should involve more than comparing seconds on a timer.
Consider:
- compatible UV wavelength;
- exposure uniformity;
- maximum frame size;
- vacuum performance;
- repeatability;
- light-source stability;
- screen-room throughput;
- and the type of emulsions you normally use.
The fastest possible exposure is not automatically the best exposure.
A useful production exposure system should deliver the energy required to cure the stencil consistently across the usable screen area while preserving the detail required by the job.
For this reason, equipment selection and exposure testing should be treated as connected decisions.
Common Screen Exposure Problems and Quick Checks
| Problem | Check First |
|---|---|
| Entire stencil washes away | Exposure level and screen dryness |
| Emulsion feels slimy | Underexposure or incomplete drying |
| Image will not wash out | Exposure level and film density |
| Fine text disappears | Film density, exposure and contact |
| Fuzzy image edges | Film-to-screen contact |
| Halftones close | Exposure, positive quality and contact |
| Random pinholes | Dust, coating bubbles and screen preparation |
| Results change between screens | Coating, drying, exposure settings and process consistency |
| Stencil breaks down on press | Exposure level, emulsion compatibility and stencil preparation |
Do not make five process changes at once.
Change one variable, test the screen, and record the result. That makes it much easier to identify the actual cause.
Frequently Asked Questions
How long should you expose a screen for screen printing?
There is no universal exposure time. The correct setting depends on the emulsion, coating thickness, mesh, UV source, film density, contact quality and other process variables. Start with your emulsion manufacturer’s technical guidance and confirm the setting with an exposure calculator or step test.
What happens if a screen is underexposed?
The stencil may remain soft, wash away during development, lose edge strength, or break down prematurely during printing. Underexposure means the stencil has not received enough effective UV energy to cure properly through its depth.
What happens if a screen is overexposed?
Fine lines, text and halftones may become difficult to wash open because areas intended to remain soluble have received too much UV exposure.
Why won’t my screen wash out after exposure?
Possible causes include excessive exposure, insufficient film-positive density, unwanted light reaching image areas, or poor artwork preparation. Check the film and exposure test before simply reducing the timer.
Why does my stencil look blurry?
Poor contact between the film positive and stencil is a common cause. A gap allows light to spread beneath the artwork edges. Vacuum exposure systems are designed to improve this contact.
Should the coated screen be completely dry before exposure?
Yes. Professional emulsion manufacturers recommend thoroughly drying coated screens before exposure. Moisture can interfere with stencil quality and make the process less repeatable.
Do I need an exposure calculator?
You can make a stencil without one, but an exposure calculator or step wedge provides a much more controlled way to determine exposure than repeated trial and error. Hanze recommend exposure-testing tools for dialing in screen exposure.
Does every mesh count need the same exposure time?
No. Changing mesh specifications can alter coating thickness and exposure behavior. When making a significant change to mesh or coating, verify the exposure rather than automatically using an old setting.
Can I use the same exposure time after changing emulsion?
You should retest it. Different emulsion technologies and formulations can have significantly different exposure characteristics.
Is a vacuum exposure unit necessary for fine detail?
Close film contact becomes increasingly important as artwork becomes finer. Vacuum systems help maintain intimate contact between the film and stencil and can therefore support sharper detail and better repeatability.
Final Thoughts
Learning how to expose a screen for screen printing is less about memorizing a specific number of seconds and more about building a repeatable screen-making process.
Start with a properly prepared screen.
Dry the emulsion completely.
Use a dense, clean film positive.
Maintain close film-to-screen contact.
Use your emulsion manufacturer’s recommendations as a starting point.
Then run an exposure test and record the result.
Once mesh, coating, drying, film output and exposure are controlled, screen making becomes much more predictable—and troubleshooting becomes much easier.
For print shops building or upgrading their screen-making workflow, choosing the right screen printing exposure unit is an important part of that process. Hanze currently supplies both cold-light and LED screen exposure equipment in multiple working sizes, allowing the exposure system to be matched to different screen formats and production requirements.
A good exposure unit does not replace proper process control. It gives you the stable UV source and repeatable working conditions needed to make that process easier to control.