Tagging Gun Safety Guide for Retail and Factory Staff
Tagging Gun Safety Guide for Retail and Factory Staff
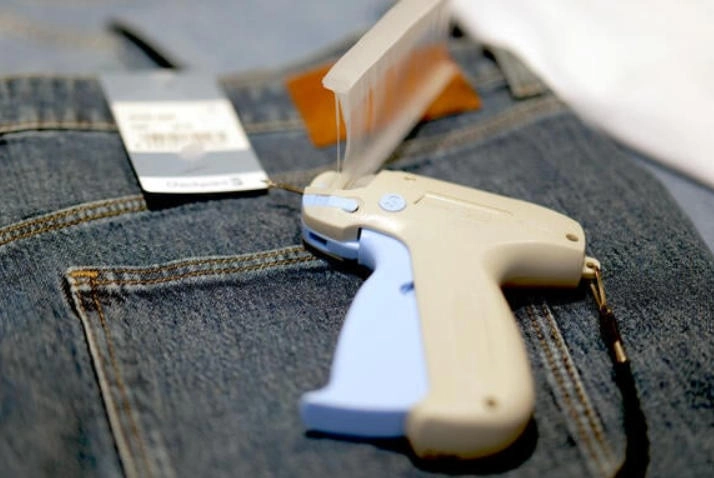
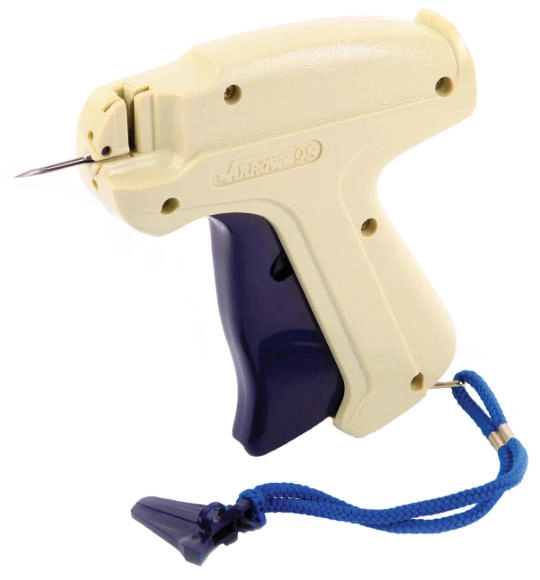
Tagging guns are widely used in clothing stores, garment factories, warehouses and packaging departments to attach hang tags, price tags and product information to garments. Although these tools are simple to operate, every needle-style tagging gun contains a sharp hollow needle that can puncture skin or damage merchandise when handled incorrectly.
Safe tagging gun use involves more than learning how to load fasteners and pull the trigger. Employees must understand where to place their hands, how to inspect the needle, when to use the needle guard, how to respond to a jam and how to store the tool after work.
Retailers and factories should establish clear operating rules instead of relying only on informal instructions from experienced employees. A consistent safety procedure helps reduce accidental needle sticks, damaged products, tool failure and avoidable production interruptions.
This guide explains practical tagging gun safety precautions for retail and factory staff. It should be used together with the operating instructions supplied with the specific tagging gun and the workplace safety requirements that apply in the user’s country or region.

Why Tagging Gun Safety Matters
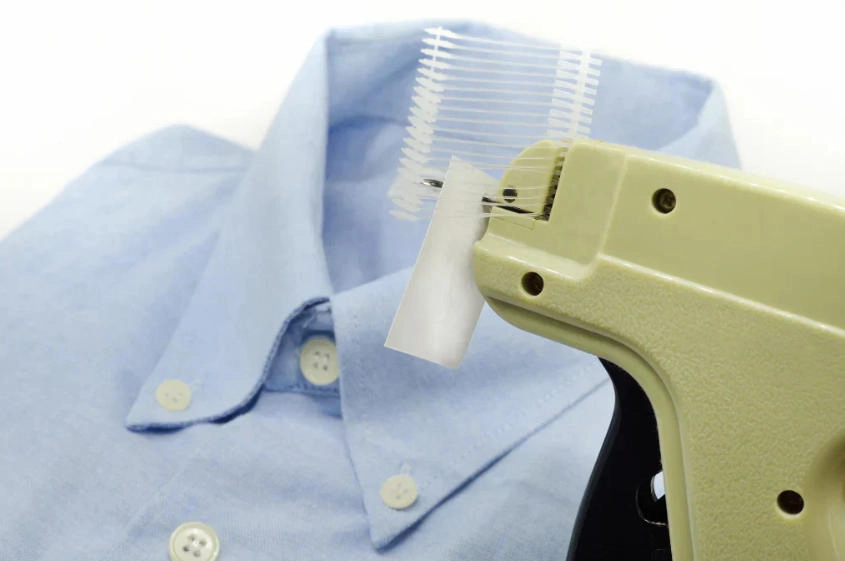
A tagging gun uses a hollow needle to create a path for a plastic fastener. The needle passes through fabric, a sewn label or another suitable attachment point. If the operator places a hand directly behind that point, the needle may pass through the material and into the hand.
Repetitive tagging can also reduce attention. Employees working through large quantities of garments may begin moving faster, holding several products at once or using more pressure when a tool does not fire smoothly. Fatigue and rushing can increase the likelihood of incorrect hand placement, tool jams and damaged needles.
Unsafe operation can affect both people and products. Common consequences include:
- Accidental needle punctures
- Snagged yarn or damaged fabric
- Visible holes in garments
- Bent or broken needles
- Jammed fasteners
- Loose or incorrectly positioned tags
- Rework and repacking
- Production delays
A written procedure helps employees develop consistent habits. It also gives supervisors a clear standard for training, observation and incident review.
Main Hazards Associated with Tagging Guns
Accidental Needle Sticks
The most direct hazard is contact with the exposed needle. A needle stick may occur when an operator:
- Places fingers behind the intended tagging point
- Tags toward the body
- Holds a small garment too close to the needle
- Passes an uncovered tool to another employee
- Leaves the gun with its needle exposed on a table
- Tries to catch a falling tagging gun
- Attempts to clear a jam with fingers near the needle
- Changes the needle without using the available guard
Employees should always assume that the needle can pass completely through the material being tagged.
Injuries Caused by Forcing the Tool
A tagging gun should not require repeated aggressive trigger pulls during normal operation. When the trigger does not move smoothly or the fastener fails to feed, the operator should stop.
Repeatedly squeezing the trigger can make a jam worse, damage internal parts or cause the needle to move unpredictably. The correct response is to place the tool in a safe position and follow the jam-clearing instructions for that model.
Bent, Dull or Loose Needles
A damaged needle may no longer enter material in a straight line. A dull tip can require more force, while a bent needle may deflect sideways. A loose needle may move inside the holder or affect fastener feeding.
Needles should be removed from service when they are:
- Bent
- Dull
- Rough or burred
- Corroded
- Cracked
- Incorrectly seated
- Difficult to lock securely
- Causing repeated snags or jams
Employees should never attempt to straighten a bent needle for reuse.
Contamination After a Needle-Stick Incident
A new or clean garment-tagging needle is not automatically a medical biohazard. However, after a needle has punctured a person, it may carry blood that is not visible.
The affected needle should not be returned to normal use or shared with another employee. The tool should be isolated, and the needle should be removed and discarded according to the employer’s procedure and applicable local requirements.
Unauthorized Access
A tagging gun is a work tool with a sharp needle. It should not be treated as a toy or left where customers, children or untrained employees can handle it.
Retail stores should pay particular attention to public counters, fitting-room areas and open worktables. Factories and warehouses should keep tagging guns in controlled work areas.
Safety Checks Before Each Shift
A short inspection before work can identify damaged tools before they cause an injury or production problem.
Inspect the Tool Body
Check the tagging gun for:
- Cracks in the housing
- A damaged or sticking trigger
- Loose components
- A damaged needle holder
- A loose needle lock
- Missing covers
- A broken wrist strap or lanyard
- Debris around the fastener track
- Previous repair damage
A cracked or loose tool should be taken out of service until it has been inspected.
Inspect the Needle
Confirm that the needle is:
- Straight
- Sharp
- Clean
- Correctly installed
- Fully locked
- Suitable for the tool model
- Suitable for the intended material
- Free from visible burrs or corrosion
Do not run a finger over the needle point to test sharpness.
Confirm Tool, Needle and Fastener Compatibility
The tagging gun, needle and fastener must belong to the correct system.
A standard tagging gun generally requires standard needles and standard fasteners. A fine-fabric gun requires compatible fine needles and fine fasteners. Micro, long-needle and specialty tools may require their own consumables.
Using incompatible components can cause:
- Misfeeding
- Broken fasteners
- Jammed tools
- Needle damage
- Unreliable tag attachment
- Unexpected tool movement
Employees should never force a fastener strip into a gun simply because it looks similar.
Check the Needle Guard
Confirm that the needle guard or safety cap is present, undamaged and stored with the tool. A guard that is kept in another room or lost inside a supply box is unlikely to be used consistently.
Inspect the Workstation
The tagging area should be:
- Well lit
- Stable
- Clean
- Free from loose needles
- Free from unnecessary tools
- Large enough to position products safely
- Organized so employees do not reach across exposed needles
The operator should have enough space to place the product flat without holding it against the body.
Personal Protective Measures
Use a Suitable Protective Tagging Glove
Some tagging tool manufacturers recommend using a protective tagging glove on the hand that supports or positions the product.
The glove should be suitable for the specific tagging task. An ordinary cotton, knitted or disposable glove should not be assumed to be puncture-resistant.
A glove does not make unsafe hand placement acceptable. Operators must still keep their fingers outside the needle path.
Keep Fingers Away from the Needle Path
The supporting hand should never be placed directly behind the point where the needle will enter.
Safer techniques include:
- Holding the product from the side
- Placing the product on a stable work surface
- Tagging through a care label or seam
- Using a support plate, anvil or guard supplied for the tool
- Repositioning small items instead of gripping them behind the needle
When a tool is equipped with an anvil or finger guard, employees should use it according to the manufacturer’s instructions.
Control Loose Clothing and Accessories
Loose sleeves, bracelets, jewelry, cords and lanyards can interfere with the product or tool. Employees should keep the work area around their hands clear.
Maintain a Stable Working Position
Do not operate a tagging gun while walking, turning, carrying a box or balancing unstable stacks of clothing. The product and operator should both be stable before the needle is inserted.
Correct Use of the Needle Guard
The needle guard is one of the simplest tagging gun safety controls, but it is often lost or ignored.
Cover the Needle Whenever the Tool Is Not in Use
Fit the guard when:
- Taking a break
- Finishing a batch
- Moving to another workstation
- Handing the tool to another authorized employee
- Placing the gun in a drawer or storage box
- Inspecting the surrounding work area
- Preparing the tool for transport
A tagging gun should not be left on a table with the needle exposed.
Use the Guard During Needle Installation and Removal
For an uncontaminated needle, place the needle point into the guard before unlocking or removing it. This allows the operator to control the needle without directly touching the sharp point.
The exact procedure varies by tool, so employees should follow the manufacturer’s instructions.
Do Not Contaminate a Clean Needle Guard
If a needle has punctured a person, do not automatically place the normal clean guard over it. Doing so may contaminate the guard and create another contact risk.
Isolate the tool and follow the workplace procedure for controlled removal and disposal.
Replace Missing or Damaged Guards
A missing guard should be replaced. Supervisors should not accept routine storage of an uncovered tagging gun as normal practice.
Safe Hand Position and Tagging Direction
Tag Away from the Body
The needle should never be directed toward:
- The operator’s torso
- The supporting hand
- Another employee
- A customer
- A person across the worktable
The tool should be oriented so that an unexpected movement would travel away from people.
Never Put a Hand Behind the Product
The product may be thinner than it appears, and the needle may pass completely through it. This rule applies to garments, labels, towels, folded fabric and packaging cards.
Even when a protective glove is worn, fingers should remain outside the needle path.
Keep the Material Flat
Wrinkled, twisted or unstable material can cause the needle to enter at an angle. Smooth the material before tagging and avoid pushing the needle through several uncontrolled folds.
Do Not Test-Fire Into the Air
A tagging gun should only be tested with the correct fasteners and suitable sample material. Do not point the tool into open space or toward another person.
Safe Loading and Unloading Practices
This section covers safety principles. Employees should use the separate operating instructions for the complete loading procedure.
Cover or Control the Needle First
Where the tool design permits, fit the needle guard before loading or unloading fasteners.
Keep the Trigger Released
Do not squeeze the trigger while inserting a fastener clip unless the manufacturer’s loading procedure specifically requires a controlled trigger action.
Use Only Compatible Fasteners
Do not trim, bend or force an incompatible fastener strip into the gun. The tool may appear to accept it but jam during firing.
Remove Damaged Fastener Clips
Do not reload clips that are:
- Bent
- Cracked
- Twisted
- Partially separated
- Missing fasteners
- Contaminated with debris
- Previously involved in a jam
Damaged clips may create repeated feeding problems.
Test on Approved Sample Material
After loading, test the tool on suitable sample material before using it on saleable goods. Confirm that the fastener feeds completely and the needle withdraws normally.
How to Respond to a Tagging Gun Jam Safely
A jam should be treated as a stop-work condition.
Stop Pulling the Trigger
Do not repeatedly squeeze the trigger. This can compress the jam, damage the feeding system or break fasteners inside the gun.
Point the Needle Away from People
Place the tool on a stable work surface with the needle directed away from hands and bodies.
Fit the Needle Guard When Possible
If the needle can be covered without moving the jammed mechanism or placing hands in danger, fit the guard before further inspection.
Remove the Fastener Supply
Follow the manufacturer’s procedure to remove the fastener clip, strip or roll. Removing the supply may release pressure and prevent more fasteners from entering the mechanism.
Follow the Model-Specific Jam Procedure
Different tools have different feed tracks and needle locks. Some require the fastener clip to be removed first. Others may require controlled needle removal.
Do not assume that a procedure used on one tagging gun is correct for another.
Avoid Improvised Repair Methods
Do not insert fingers, knives, pins or screwdrivers into the mechanism unless the manufacturer’s instructions require an appropriate tool and the employee is authorized to perform the task.
Remove the Tool from Service if the Jam Remains
If the jam cannot be cleared normally:
- Fit the guard if possible.
- Mark the tool “Do Not Use.”
- Place it in a separate maintenance area.
- Notify the supervisor.
- Use a verified replacement tool.
An employee should not return a partly jammed gun to a shared work area.
Safe Needle Replacement
Needle replacement should be performed only by trained or authorized staff.
Use the Correct Replacement Needle
Confirm the tool model and needle type. Two needles may look similar but have different bases, slots or lengths.
Cover the Old Needle
If the needle is uncontaminated, place its point into the guard before releasing the needle lock.
Unlock the Needle According to the Manual
Turn, lift or release the needle lock exactly as instructed for the tool. Do not use excessive force.
Pull the Needle Straight Out
Avoid twisting or bending the needle. A broken needle may leave a sharp section inside the holder.
Align the Replacement Needle Correctly
The slot in the needle must align with the fastener path in the gun. Incorrect alignment can prevent the fastener from passing through the needle and may cause immediate jamming.
Lock the Needle Securely
Confirm that the needle is fully seated and the lock has returned to its operating position.
Test Before Normal Production
Use compatible fasteners and approved sample material. Confirm smooth trigger movement, complete fastener release and normal needle withdrawal.
What to Do After a Needle-Stick Injury
Stop Work Immediately
The injured employee should stop using the tagging gun. The same exposed needle should not be used on another person’s workstation or returned to production.
Notify a Supervisor
Report the incident according to the company’s workplace injury procedure. Do not hide a minor puncture simply because bleeding is limited.
Follow Workplace First-Aid Procedures
The employee should follow the employer’s first-aid process and seek medical evaluation when required by workplace policy, local guidance or a healthcare professional.
This article does not replace professional medical advice.
Isolate the Tool
Place the tagging gun in a controlled location so that no one else touches or uses it.
Remove the Needle from Service
A needle that has punctured a person should not be shared or returned to routine use. It should be removed and discarded according to the employer’s procedure and applicable local rules.
Understand the Scope of Sharps Regulations
In the United States, OSHA’s specific bloodborne-pathogen and sharps requirements concern occupational exposure to blood or other potentially infectious materials.
A puncture from a clean object is not automatically treated in the same way as a puncture from a contaminated medical sharp. However, it may still need to be recorded or investigated under general workplace injury rules, depending on the circumstances.
Employers outside the United States should follow their own national and local requirements.
Review the Cause
The supervisor should review:
- The employee’s hand position
- The tagging direction
- Whether the needle guard was available
- Whether a suitable glove was used
- Whether the tool was damaged
- Whether the employee had been trained
- Whether the workstation design contributed
- Whether corrective training or equipment changes are needed
Safe Storage and Work Area Management
Store the Tool with the Needle Covered
Fit the needle guard before placing the tool in storage.
Use a Designated Storage Location
Suitable storage may include:
- A locked drawer
- A tool cabinet
- A supervisor-controlled storage box
- A marked workstation holder
- A closed tool case
The tool should not be placed loosely inside a carton of garments.
Keep Tagging Guns Away from Children and Customers
Do not store the tool on an unattended retail counter or open shelf. Back-room work areas are generally more suitable for tagging activities.
Store Replacement Needles in Their Cases
Do not keep replacement needles:
- Loose in drawers
- Mixed with fasteners
- Uncovered on worktables
- In clothing pockets
- Inside unmarked containers
The packaging should identify the compatible tool type.
Separate Damaged Tools
Damaged tagging guns should be placed in a clearly marked maintenance container. They should not remain mixed with serviceable tools.
Tagging Gun Safety Training Program
Permit Trained Employees Only
Stores and factories should identify which employees are authorized to:
- Operate the tool
- Load and unload fasteners
- Replace needles
- Clear simple jams
- Inspect tools
- Remove damaged tools from service
Provide Tool-Specific Training
Training should use the actual tagging gun model operated by the employee. Needle locks, guards, loading systems and jam procedures can differ.
Demonstrate Safe Hand Placement
The trainer should physically demonstrate:
- How to hold the garment from the side
- Where the needle will travel
- Why fingers must not be placed behind the fabric
- How to use a support surface
- How to cover the needle after use
Include Supervised Practice
New employees should practise on approved sample materials rather than saleable products. The trainer should observe hand placement and tagging direction before allowing unsupervised work.
Teach Stop-Work Conditions
Employees should stop using the tool when:
- The needle is bent
- The needle becomes loose
- The trigger sticks
- Fasteners stop feeding
- The tool jams
- The needle guard is missing
- The housing is cracked
- A needle-stick injury occurs
- The correct fasteners are unavailable
Record Training
A training record may include:
- Employee name
- Tool model
- Training date
- Trainer name
- Topics covered
- Practical assessment
- Refresher date
- Corrective training, if needed
Retail Store Safety Rules
Use a Controlled Work Area
Whenever possible, tag products in a stockroom or designated back-room area rather than on an open sales counter.
Do Not Leave the Tool Unattended
If an employee leaves the workstation, the needle should be covered and the tool stored.
Limit Public Access
Customers should not be able to pick up or test the tagging gun.
Check Returned or Previously Worn Products
Before inserting a needle into returned products, check for hidden objects inside pockets, linings, folds or packaging.
Keep Children Away
The tool and replacement needles should always remain outside children’s reach.
Factory and Warehouse Safety Rules
Standardize Each Workstation
A tagging workstation should contain:
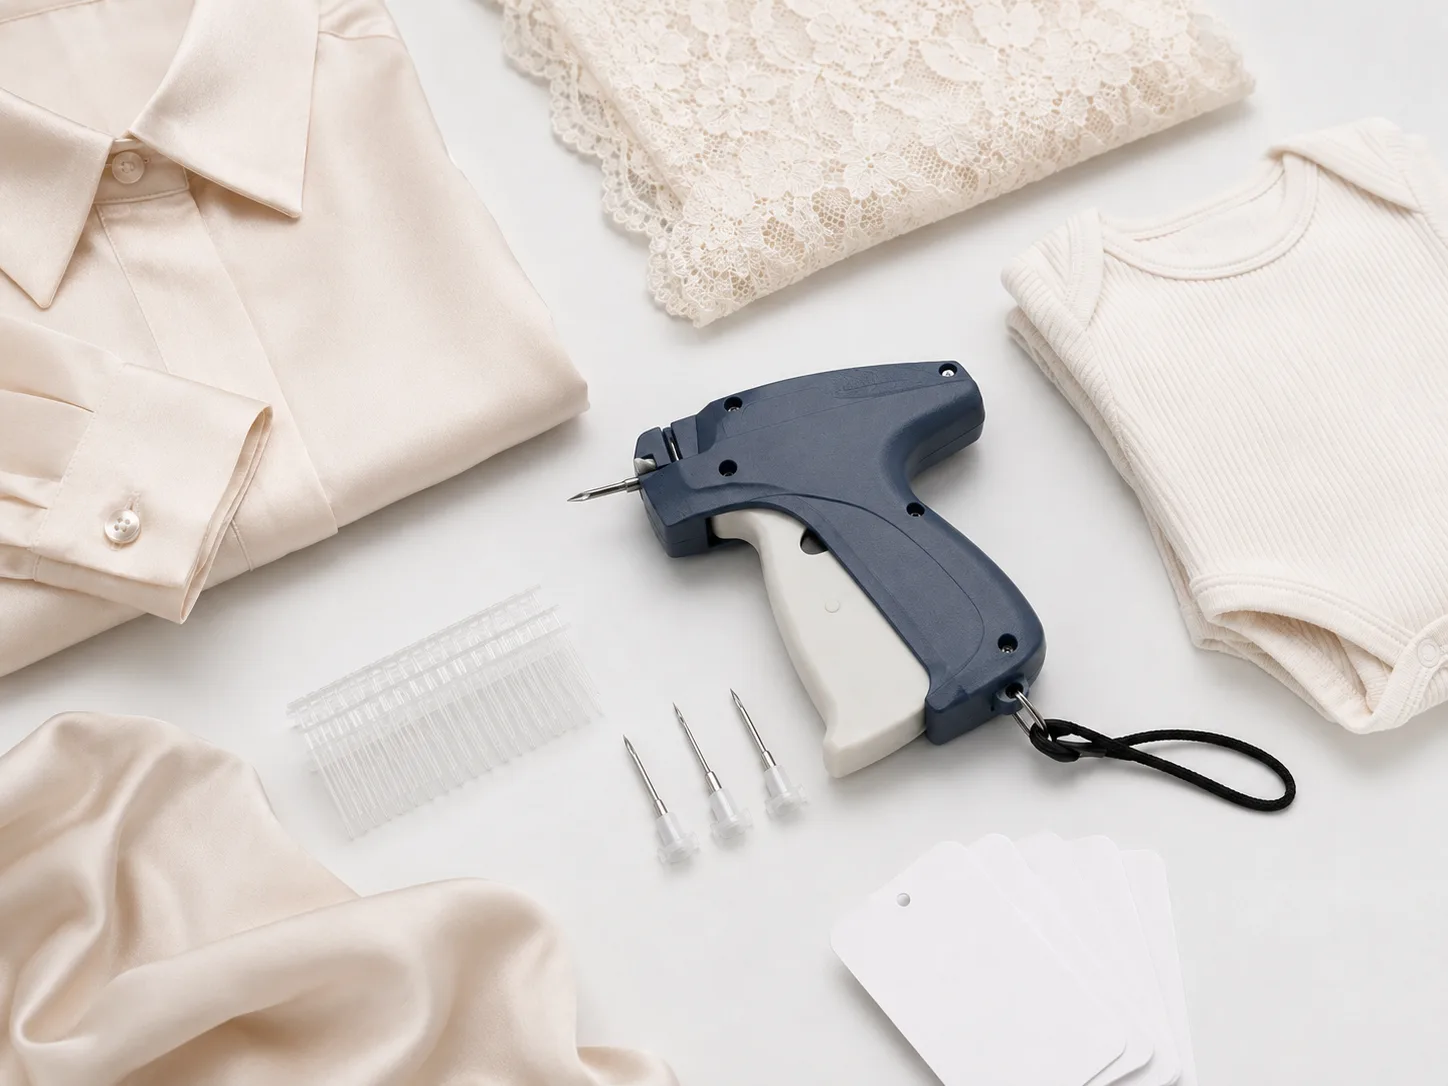
- The approved tagging gun
- Compatible fasteners
- Correct replacement needles
- Needle guard
- Suitable protective glove
- Waste container
- Approved tagged sample
- Safety instruction card
Inspect Tools at the Start of Each Shift
Use a brief documented check for needle condition, guard availability, trigger movement and fastener compatibility.
Reduce Fatigue Where Practical
Long periods of repetitive tagging can reduce concentration. Work planning may include reasonable breaks, workstation adjustments or task rotation where operationally practical.
Control Damaged Tools
Supervisors should decide when tools are repaired, replaced or discarded. Operators should not make unapproved modifications.
Include Safety in Quality Checks
Supervisors should inspect:
- Tag position
- Product condition
- Needle condition
- Correct guard use
- Workstation organization
- Fastener compatibility
- Employee hand position
Tagging Gun Safety: Do and Don’t
| Do | Don’t |
|---|---|
| Cover the needle whenever the tool is not in use | Leave the needle exposed on a table |
| Use a suitable protective tagging glove where recommended | Assume an ordinary fabric glove is puncture-proof |
| Keep fingers outside the needle path | Place a hand behind the tagging point |
| Use compatible guns, needles and fasteners | Mix standard, fine and specialty systems |
| Stop immediately when the tool jams | Repeatedly squeeze the trigger to force a jam |
| Replace bent, dull or damaged needles | Straighten and reuse damaged needles |
| Store the tool in a controlled location | Leave it accessible to children or customers |
| Follow the instructions for the exact tool model | Assume all tagging guns work the same way |
| Report needle-stick incidents | Return a used injury-related needle to normal service |
| Test on approved sample material | Test-fire the gun into the air |
Supervisor’s Daily Safety Checklist
Use the following checklist at the start or end of each shift:
- Is the tool body free from cracks and damage?
- Does the trigger move normally?
- Is the correct needle installed?
- Is the needle straight and securely locked?
- Is the needle guard available?
- Are the correct fasteners at the workstation?
- Is a suitable protective glove available where required?
- Is the work surface stable and well lit?
- Are loose needles stored safely?
- Are damaged tools separated from serviceable tools?
- Are only trained employees using the tool?
- Has the first tagged product been checked?
- Have jams, tool failures or injuries been reported?
- Is the tool covered and stored after the shift?
Frequently Asked Questions
Are tagging guns dangerous?
Tagging guns contain sharp needles and can cause puncture injuries if handled incorrectly. They should be used by trained staff with correct hand placement, an available needle guard and a controlled workstation.
Should staff wear gloves when using a tagging gun?
Some manufacturers recommend protective tagging gloves. The glove should be suitable for the task and does not replace correct hand positioning.
When should the needle guard be used?
Use the needle guard whenever the tool is not in use and when installing or removing an uncontaminated needle, following the instructions for the specific tool.
Where should the supporting hand be placed?
Keep the supporting hand to the side of the tagging point. Never place fingers directly behind the area where the needle will pass.
What should I do if the tagging gun jams?
Stop pulling the trigger, direct the needle away from people, fit the guard when possible, remove the fastener supply and follow the manufacturer’s jam-clearing procedure. Remove the tool from service if the jam cannot be cleared safely.
Can employees share tagging guns?
Tools may be shared under controlled workplace procedures while they are clean and serviceable. A needle that has punctured a person should not be returned to shared use.
What should happen after a needle-stick injury?
Stop work, notify a supervisor, follow workplace first-aid and reporting procedures, isolate the tool and remove the affected needle from service. Seek medical advice when required.
Can a tagging gun be left on a retail counter?
It should not be left unattended where customers or children can reach it. Store it with the needle covered in a controlled location.
Can a bent needle be straightened and reused?
No. A bent, dull, loose or damaged needle should be replaced with a compatible new needle.
How often should employees receive safety training?
Training should be provided before first use, when a new tool or procedure is introduced, and whenever incidents, unsafe behaviour or repeated errors show that refresher training is needed.
Conclusion
A tagging gun is a useful tool for stores, garment factories and packaging departments, but its sharp needle requires consistent safety controls.
Safe operation depends on correct hand placement, suitable protective equipment, regular inspection, proper use of the needle guard, controlled jam clearing and secure storage. Employees should stop work whenever a tool is damaged, jammed or behaving unexpectedly.
Retailers and factories should support these practices with written procedures, model-specific training, supervisor checks and clear incident reporting. These measures help protect employees, reduce product damage and maintain reliable tagging operations.
Looking for reliable tagging guns, compatible replacement needles, needle guards, fasteners and garment-tagging accessories? HANZE supplies standard, fine-fabric, long-needle and non-piercing tagging solutions for retailers, garment factories, wholesalers and packaging teams. Contact us for product samples, compatibility guidance and volume pricing.
Safety Notice: This guide provides general workplace information. Always follow the instructions supplied with the exact tagging gun model, the employer’s safety procedures and the laws and regulations that apply in the workplace location.